Since the release of Fallout Shelter on Android a month ago I’ve been spending way too much time playing it than I’d like to admit. The game is very addictive, and I built several vaults from scratch during this time.
The biggest reason Fallout Shelter is such a time-killer are the Objectives: just as you complete one of them, another pops up just begging you to complete it before you go off. I’m always hopeful the next one will include a Lunchbox as reward, and the excitement of opening one is as fresh as the first time.
 The following guide will give you a breakdown of every Objective in Fallout Shelter in detail and explain how to complete them in the fastest and most efficient way. Though it’s not terribly difficult to figure this stuff by yourself after a while, I’m certain you will find some of my tips and tricks helpful so check out the guide if you want to maximize your time (and Caps!) in this game.
Have # dwellers dance in the living room
Simply assign a male and female dweller in any living room, and have them dance with one another. Make sure you re-assign the dwellers immediately after they start dancing if you don’t want them to make babies. Pretty annoying objective, but easy to complete. After you have 150 dwellers you won’t see it appear anymore.
If you want to speed up the process, assign dwellers with higher Charisma stat. This objective has a tendency to appear right after you complete one of the following two, just to make it extra annoying.
Get # females pregnant
Simply get a specified number of females pregnant. Dwellers who are pregnant already won’t count, only those you knock up after you get the objective. After your dwellers start dancing, it won’t take long until they do their thing. Higher Charisma also affects how long you have to wait until your dwellers start having sex, so if you want to speed up the process equip them with some +Charisma gear.
Deliver # babies
Get women pregnant, and have them deliver babies. Sometimes you don’t want to expand your vault too quickly, so if this objective rewards a few caps you may even consider skipping it. If it’s a Lunchbox, don’t skip it.
Worth noting is that once your vault population reaches 60 dwellers, Deathclaw attacks will begin. Until that point you only have to deal with Raiders.
Merge # pairs of rooms together
Normally this sounds like a pretty expensive endeavor, but this objective is actually one of the easiest to complete, unless you’re completely out of caps. Simply build 3 of the cheapest rooms (probably Diner or Water Treatment) next to each other, press the “Upgrade” room button, and destroy it. Repeat until you have combined enough rooms to complete this objective.
Even later on when you need to combine 5 rooms or more, this won’t cost more than 2,500 caps or so which is very affordable. Objective often rewards a lunchbox, and you should never skip it! Just use my trick and you’ll complete it in a minute.
Upgrade # rooms
Just like merging, this objective is extremely easy to complete. Just build a 1×1 room which is cheapest (likely Diner or Water Treatment again), upgrade it, and then destroy it. Repeat until objective is completed.
If you’re asking yourself why destroy the room: the cost to build a room increases depending on how many rooms of the same type you already have. If you need the room, feel free to keep it. Alternatively you can upgrade your existing 3x rooms, but that can cost thousands of caps per room and may ruin your other plans.
Kill radroaches/molerats without a weapon
This one’s easy. Simply un-equip all weapons from your dwellers in one room, and keep rushing it until you kill enough Radroaches or Molerats, depending on which objective you get. Just make sure you have plenty of Stimpacks available to heal your workers, as they will take a ton of damage (you will likely even need to heal them during the incident to make sure they don’t die).
Dwellers will stop incidents faster (thus taking less damage) in rooms which are not upgraded.
Make sure you also have max number of dwellers in the room to make it a bit easier, and keep in mind that Molerats only spawn in rooms directly touching dirt. The quickest way to get Molerats is to just build a 1×1 room and assign 2 dwellers in it. You will only get 1 or 2 Molerats spawned each time, but workers are easier to heal and you’ll use less Stimpacks this way.
Collect # weapons/outfits
This one requires you to send dwellers out in the Wasteland and have them collect a specific number of weapons or outfits, depending on objective goal. The objective is updated or completed once your dwellers get back to the vault and you press the “Collect” button, which is the reason why I usually have 2-3 dwellers standing outside my vault at all times.
In case you get this quest while you have no dwellers exploring the wasteland, you may be looking at over 24 hours of waiting until they collect the required number of items, which is far too long to wait for my taste. This objective often has a Lunchbox as reward so you’ll want to complete it as fast as possible. If you can afford to have a couple of dwellers waiting outside your vault with equipment ready to be collected, that’s the best way to ensure you complete this objective quickly.
Sell # weapons or outfits
Pretty straightforward objective. Unless a majority of your dwellers already have weapons equipped you may want to skip this, or just sell outfits. Weapons are far too important and valuable especially early on, unlike outfits which become fairly obsolete once you start training S.P.E.C.I.A.L. stats.
Since after a while you won’t be needing the equipment you will be selling it anyway, so there’s not much point in skipping this objective. When the number of items you need to sell reaches 500+, it will get increasingly difficult to complete it, but it will pop up constantly so abandoning it will only delay the inevitable.
As a sidenote, don’t sell any +7 equipment: it’s hard to come by and very useful. Even if you dwellers have maxed stats, increasing it further with equipment does work!
Send # dwellers in the Wasteland
This objective requires you to send a number of dwellers out into the wasteland. The upside to this objective is that you can send them to explore, and immediately recall them back. Don’t bother even equipping them with any gear or Stimpacks since they won’t spend any.
And that’s exactly how you do it! Just be careful about opening your vault doors so many times: it’s likely you will get attacked by Raiders or Deathclaws while or right after completing this objective.
To minimize the impact of a Raider or Deathclaw attack make sure your dwellers are healed up and have extra Stimpacks ready to be used in a pinch. These attackers will go to every room in your vault until they’re defeated, but make sure you plan building your vault to ensure they never have to backtrack and go to the same room twice! This is very important, as they will take more than 50% of your dweller’s life in the first pass, and if they have to pass through the same room again your dwellers will die (unless you’re quick with using Stimpacks).
Have a dweller explore the wasteland for # hours
Fairly annoying objective which can take a while to complete since it’s not always convenient to send dwellers outside, especially if you already have several exploring. Unfortunately this objective will only track dwellers you send after you get the objective.
Despite the ambiguous wording of this objective’s goal, it updates once your dweller has been outside for a full hour. It will update at 1:00, or 2:00, or whenever a full hour passes.
Also, Objective may say “Have a dweller exploring the wasteland for 18 hours”, but that doesn’t mean a single dweller needs to be exploring for 18 hours, instead multiple of them can explore for over an hour and contribute to the objective.
If it takes too long and you can’t send any dwellers to explore you may even consider abandoning this objective, especially if the reward is a few caps.
Kill # of creatures in the Wasteland
Unless you get this very early on when you can’t send too many dwellers in the Wasteland, this is a very easy objective. Doesn’t even require you to do anything in particular: simply have dwellers out of your vault exploring and they’ll update your objective constantly.
The only way to really speed up completion of this mission is to send more dwellers out in the wasteland. You can send more vault dwellers out for a short period even without Stimpacks and return them as soon as you complete the objective, or once they get low health. Unlike the objective to have dwellers explore for hours, dwellers who are already out do count for completing this objective.
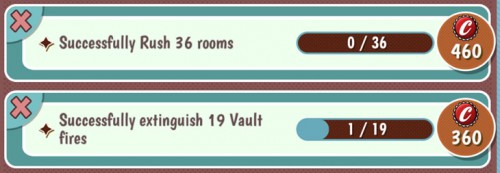
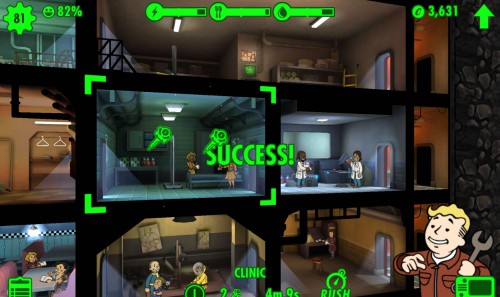
Successfully rush # rooms
You can keep rushing the same room over and over again if you want, but the chance to fail will increase with each attempt so you’ll probably want to distribute rushing evenly across all rooms. Alternatively, you can keep rushing a Clinic/Medbay/Hospital; even if you fail, you can use the produced Stimpacks to heal your dwellers back up constantly.
You can decrease the chance to fail at rushing a room by increasing your dweller’s Luck, and another S.P.E.C.I.A.L. attribute dependent on the production room type: Strength, Perception, Agility, Endurance, or Intellect. Assuming you have dwellers with 10 in main room’s attribute (S, P, E, I, or A) and Luck, you can bring the fail chance to a minimum of 60%. Increasing stats above 10 with equipment can bring the fail chance down even further.
Also worth noting is that rushing rooms uses the average SPECIAL of your assigned dwellers, so if you have one high SPECIAL guy it works better to use him alone.
Use ONE dweller with max proper S/P/E/I/A (depending on the room) in a room and outfit with +7 main stat or luck so you can rush one room twice with 0% incident rate.
Stop # incidents
Molerat attacks and Radroach infestations, fires, and even Raider and Deathclaw attacks count towards completing this objective. Typically you will simply keep rushing a room until you’ve completed the objective. As mentioned above (and explained in more details in my other guide) you can keep rushing a Medbay indefinitely.

Successfully extinguish # vault fires
This specifically requires you to put out fires in your vault, and the fastest way is to create incidents yourself. Once again, you can keep rushing a single room, and top off your dweller’s health with Stimpacks.
You will put out fires more quickly in non-upgraded rooms.
Though it may be 50:50 between Radroach infestations and room fires, whenever you get this objective fires will spawn less frequently. You may need to spend half an hour continuously rushing the same room to complete this mission, but it’s still easy to complete. You’ll even get some extra caps along the way when you succeed a rush!
Assign # of dwellers to the right room
This one can get tricky, but it’s actually fairly easy once you get the hang of it. I actually used to skip this objective every time (even if it awarded Lunchpacks), until I figured out how easy it actually is to complete it.
The correct room for any dweller is the one that corresponds to their highest S.P.E.C.I.A.L. stat. As an example, a dweller who has Perception as their highest attribute, any Water room will be the “right” room (“Armory” training room will work as well). Dwellers who are already assigned to the “right” room once you get this mission won’t count towards completion, even if you change their highest stat with equipment.
So here’s how I complete this objective in just a few minutes. Instead of rearranging my entire vault and messing up my plans, I just assign dwellers who are currently training to production rooms. I usually have a few empty production rooms to store extra resources, and I just take a few dwellers currently not producing anything and assign them there for a second. To complete the objective simply check your training rooms, look at which attribute your dweller has highest, and assign them to the correct room: Strength to power production, Agility is for food rooms, Perception for water treatment, Endurance for Nuka-Cola Bottler, and Intelligence for Medbays and Science Labs.
Try to equip dwellers in the training room with an outfit to boost the SPECIAL that is not being trained to be higher than the one being trained at all times (i.e. +7 End or Luck on someone who trains in the Strength room). So when the objective pops, you can just move the person to the proper room which will count toward the objective.
If a dweller has an equal value in two attributes there’s a good chance he won’t count towards completing the objective no matter where you assign him. In that case simply equip them with a piece of gear to increase one attribute above the rest, and you will easily complete the objective. For the purpose of completing this objective, raising SPECIAL stats above 10 with equipment will work!
Kill # raiders/deathclaws without a weapon
You’ll need to unequip any weapons on your dwellers, and get Raiders to attack your vault. Instead of waiting for them to come, you can keep sending your dwellers out in the Wasteland continuously (return them immediately after if you want), as opening your Vault doors will increase the chance for them to attack you. If you know which room(s) Raiders usually die in when they attack you, you can un-equip weapon only on dwellers assigned there.

I only got this objective once or twice in weeks of playing so it seems to be pretty rare. And I always skipped it, as it’s just not worth the effort even for a Lunchbox. There’s also the objective to kill Deathclaws, which is even worse.
Raise any special stat of # dwellers
Very straightforward objective: place your dwellers in training rooms, and wait! This objective can take a while to complete, and has a nasty habit of appearing in the worst time. Sometimes you may just want to leave it over night and complete it the next day.

There’s also the objective to raise only one particular stat on a number of dwellers. This one is clearly even more difficult, but does in most cases involve a Lunch Pack so it’s worth the wait. If you want to speed up completion, make sure you assign dwellers with very low stat value so their training takes less than an hour.
It’s worth noting that raising a stat on the same dweller twice will not count towards completing this objective. In later stages when you need to raise stats on a quarter of your Vault’s population this objective can be very annoying (and unfortunately, frequent).
Collect # food/water/power/Stimpacks
Straightforward objective which doesn’t require you to do anything special; simply go on as usual and collect resources produced by your rooms. The easiest objective is to collect Stimpacks, since as I mentioned before you can just rush your Medbay indefinitely for caps and Stimpacks to heal your dwellers. If you’re looking for quick and easy caps, you’ll be doing it anyway.

Of course you can speed up the process of collecting Food, Water, or Power by rushing rooms. Getting any of these objectives are one of my favorites actually, and quite often you can get a Lunch Pack as reward.
Collect # caps
Another dream objective, especially when it awards a Lunch Pack. The amount you need to collect increases with the development of your vault, but so does your income and this objective is very easy to complete at any stage.

Collecting caps is of course easiest by rushing rooms, and that’s exactly how you should complete it. Collecting 8000 caps only takes me about 20 minutes of repeated rushing so don’t abandon this objective no matter how much you need to collect.
When rushing rooms, dweller’s Luck not only decreases the chance to fail but also increases the chance you’ll get extra caps.
Level up # dwellers
Simply tap on a specified number of dwellers when they level up. No real way to rush this objective quickly, except staying online and collecting resources from production rooms. Note that only dwellers assigned to production rooms will be getting experience and levels: dwellers assigned to non-production rooms do not get experience.
Exploring the wasteland also awards XP and the levels gained outside your vault do count towards completing this objective. If you have plenty of level 1 dwellers in training rooms, temporarily assigning them to production rooms will quicken the progress since they’ll gain a level within minutes.
Equip # of dwellers with outfit/weapon
Requires a lot of tapping, but easily completed. Simply equip the required number of outfits or weapons on unique dwellers. Dwellers who are currently wearing a piece of gear can count for the objective as well: unequip their current armor or weapon, and re-equip it right after and you’ll get your objective in no time.

If you don’t have enough outfits or weapons you’re probably not sending enough (or any) dwellers into the wasteland, or you sold all your equipment, but both of this is easily remedied.
The same weapon or outfit only counts once but the same type of equipment will count if you equip multiple of them without taking them off before equipping more. When you take a piece of equipment off it goes “on top of the pile” so the next time you equip someone with that type of gear it will be the one that was previously unequipped.
There’s also objectives requiring you to equip a certain number (usually 2) of rare weapons on dwellers, such as a Gauss Rifle, Plasma Rifle, or Gatling Laser. There weapons aren’t easy to come by, and unless you already have the required number of them I would suggest abandoning this objective. After over 4 weeks of playing the same vault, I still have zero Gatling Lasers and a grand total of one Plasma and one Gauss Rifle, so the chances of receiving them are less than stellar.
Special thanks to redditors Zelfana and Einnoir for their contributions to this guide!
I hope my guide helped you understand Fallout Shelter’s objectives better. If there’s anything else that confuses you feel free to ask in the comments below!


